How to Grow Basil Hydroponically: The Complete Beginner's Guide
Not to be overly dramatic, but if I could only grow one herb hydroponically for the rest of my life, it would be basil.
Not only is it one of the easiest plants to grow indoors, but it's also an expensive one to buy at the grocery store. Instead of paying $3 or $4 for a tiny plastic package that turns into green slime in the back of the fridge. Instead, I would rather invest that same money into a package a seeds that I can use to grow and harvest fresh basil whenever I need it—365 days a year. It seems like a no-brainer to me. You can harvest it at the peak of freshness, chick-full of nutrients with no ✈️ or 🚂 or 🚛 involved!
I've grown basil in everything from countertop AeroGardens to larger Rise Gardens, and after years of experimenting, I've found a few simple techniques that keep my plants producing for months. In this guide, I'll show you exactly how to do the same.
Disclosure: Some of the links below are affiliate links, meaning, at no additional cost to you, I will earn a commission if you click through and make a purchase.
What is Basil?
Basil (Ocimum basilicum) is a member of the mint family with around 60 different varieties. It’s typically an annual, ranging from 30–150cm tall depending on the cultivar. Native to tropical regions like India, it grows across Africa and Southeast Asia. Each variety carries its own distinct essential oils, which is why they all smell and taste so different. But all of them are delicious as far as I am concerned.
Benefits of Growing Basil Hydroponically
Being able to harvest basil, year round right before you eat it, is more than enough in my books. But in case you still need convincing let’s go through some of the benefits of growing basil hydroponically.
You can harvest year-round, even in the dead of winter if you live in a northern climate, or in the dead of summer if you are somewhere south
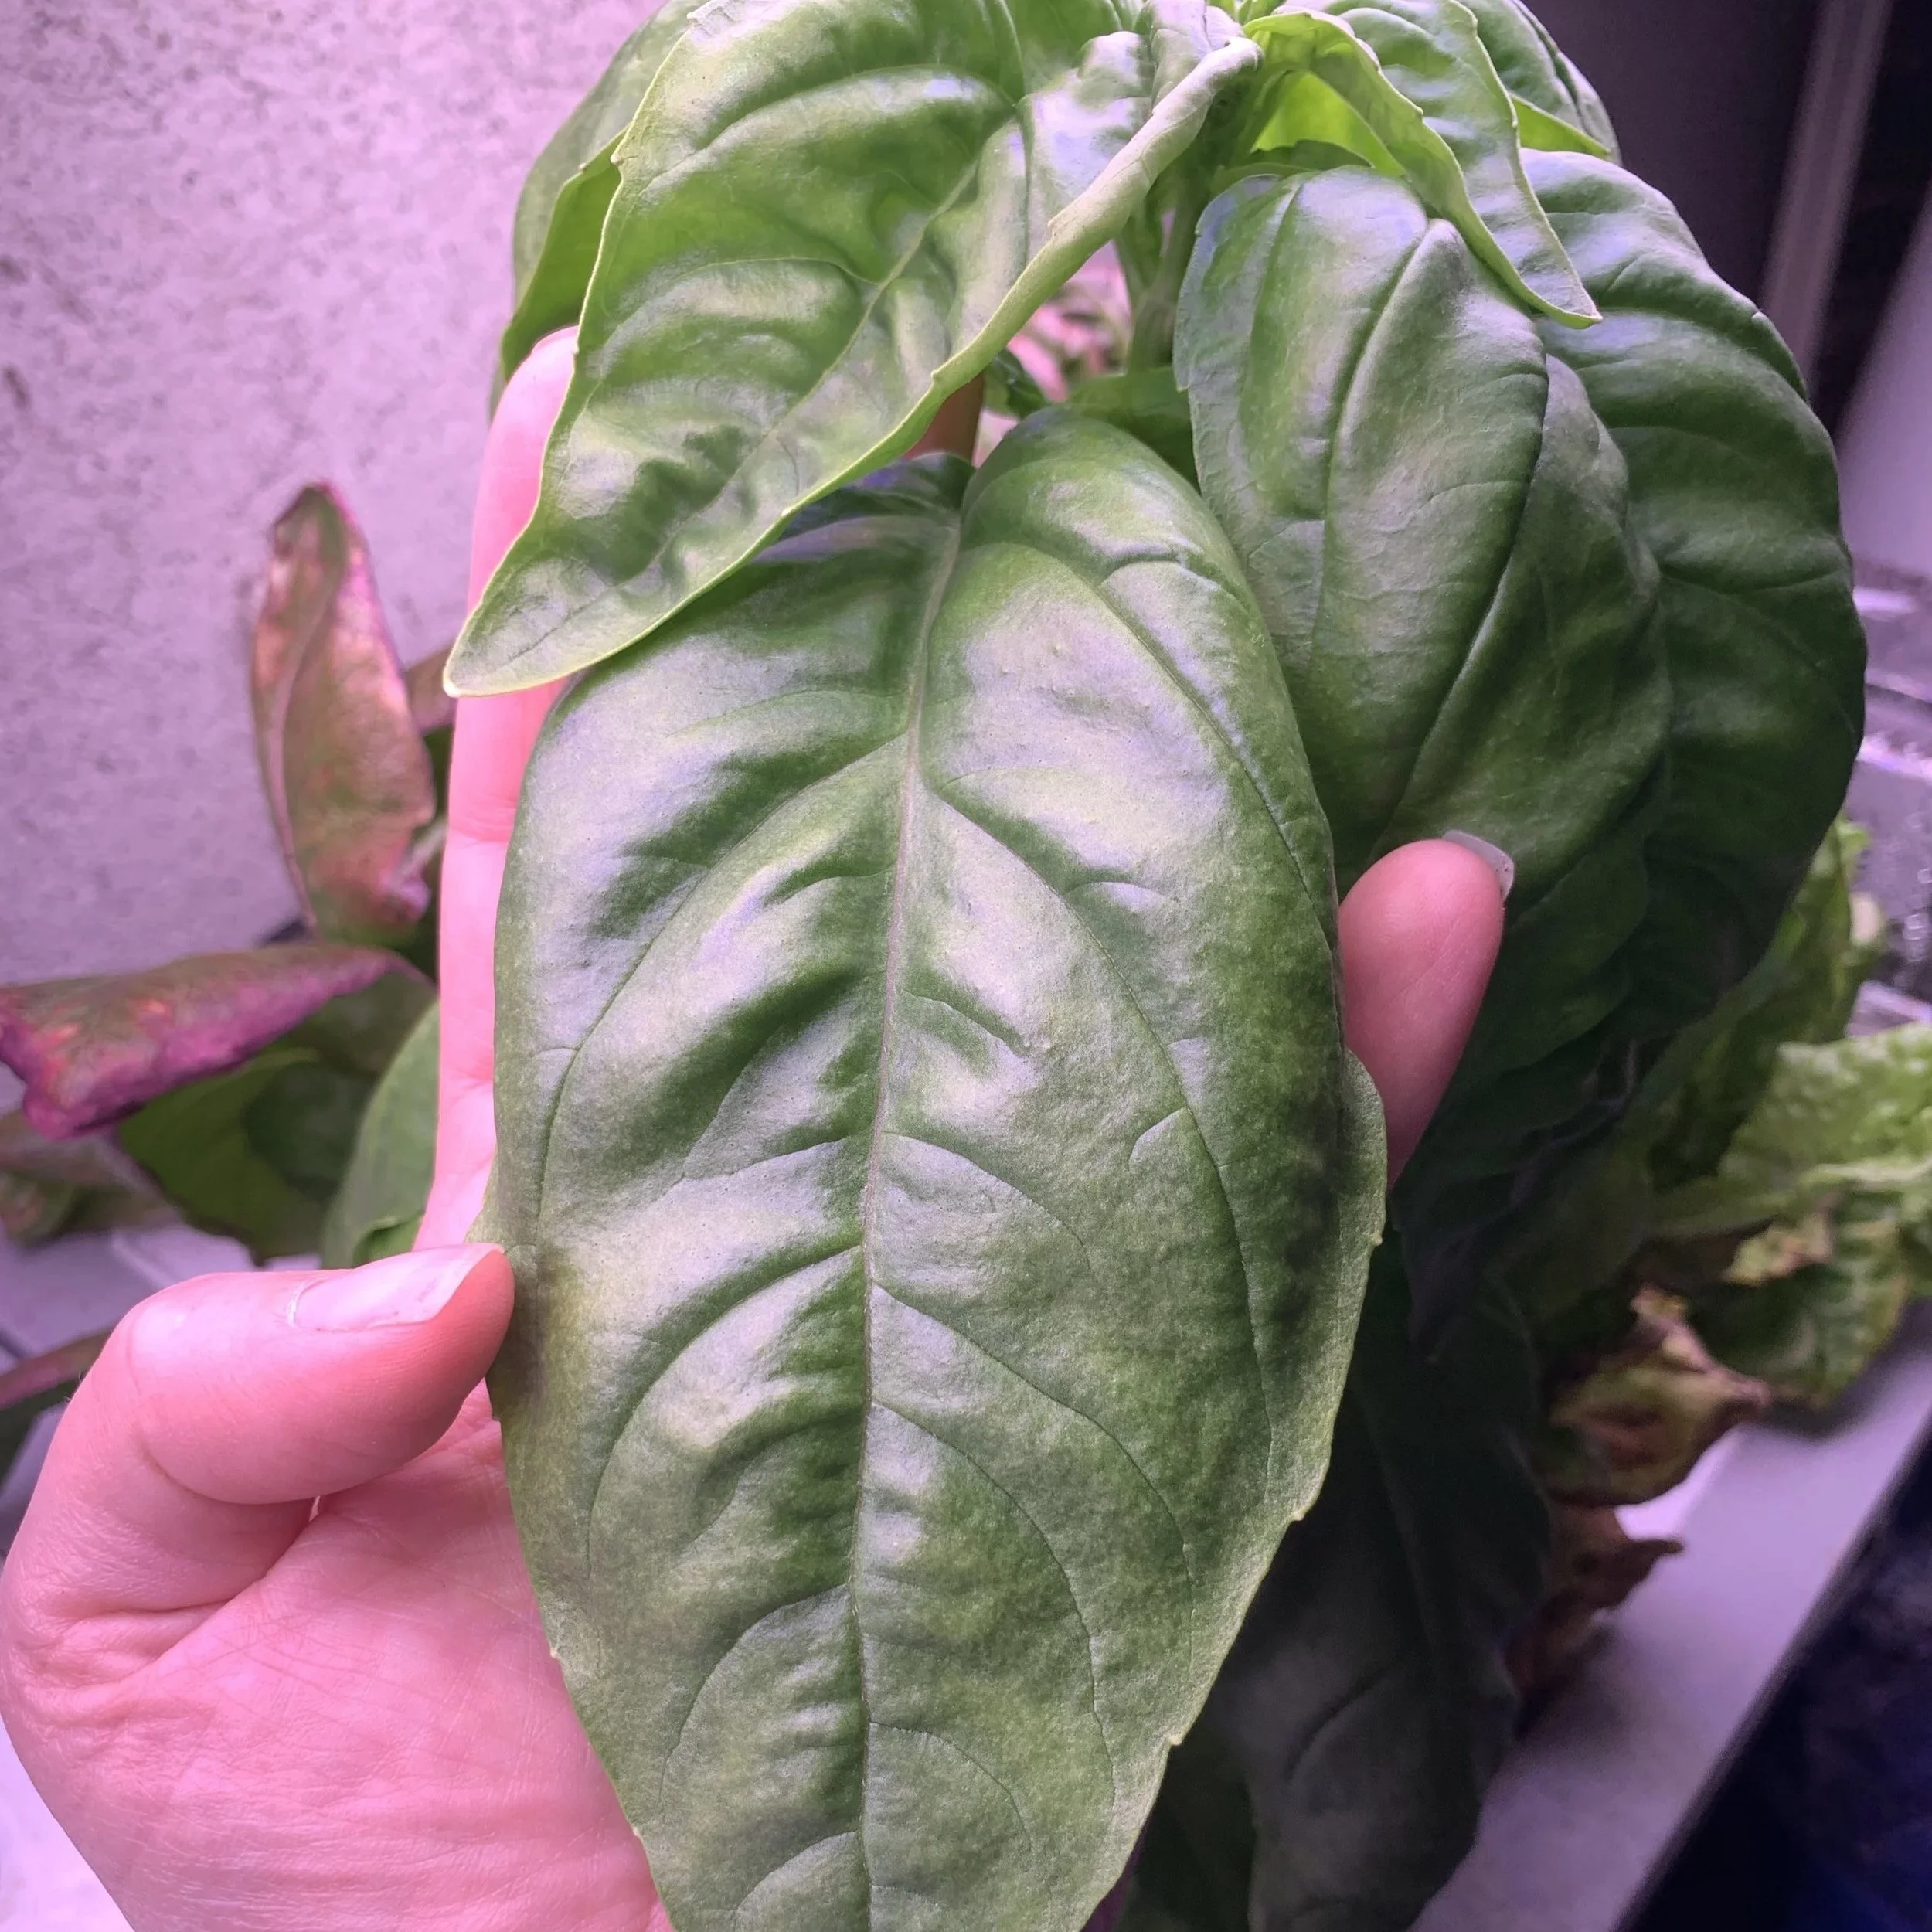
Basil grows fast and has the BIGGEST leaves ever when grown hydroponically. I have had Genovese leaves the size of my hand.
Indoors you can control the temperature so that it has optimal conditions, without the temperature fluctuations that occur outdoors
Constant moisture and dialled in nutrients lead to explosive growth
You can avoid soil-borne diseases
Little to no pest issues indoors
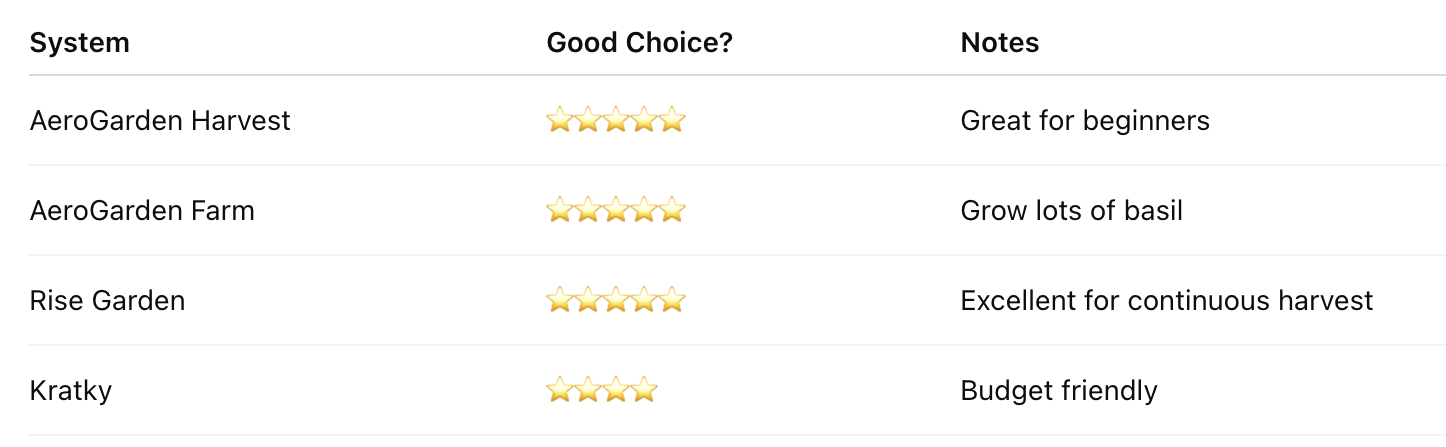
Best Hydroponic Systems
Best Basil Varieties
Not all basil is created equal when it comes to hydroponic setups. Here are my favourites, plus a few others worth knowing:
Emily (Genovese) basil — compact version of classic Genovese, ideal for countertop Aerogardens and smaller setups
Dark purple opal basil — beautiful Italian-style basil with deep purple leaves
Thai sweet basil — essential for Thai cooking, with a sweet, spicy licorice flavour
Dwarf Greek basil — only grows 6–10”, perfect for hydroponic containers, with a nice anise-spice flavour
Genovese basil — the classic Italian heirloom, massive flavour, fantastic for bruschetta and pesto
Thai holy basil — staple for dishes like Pad Kee Mao, with a spicy clove-like depth
Lettuce leaf basil — Japanese variety with enormous 3–5” leaves
Lime basil — bright citrus punch, great for Southeast Asian dishes
Persian (Reyhan) basil — spicy and lemony, a real wildcard worth trying
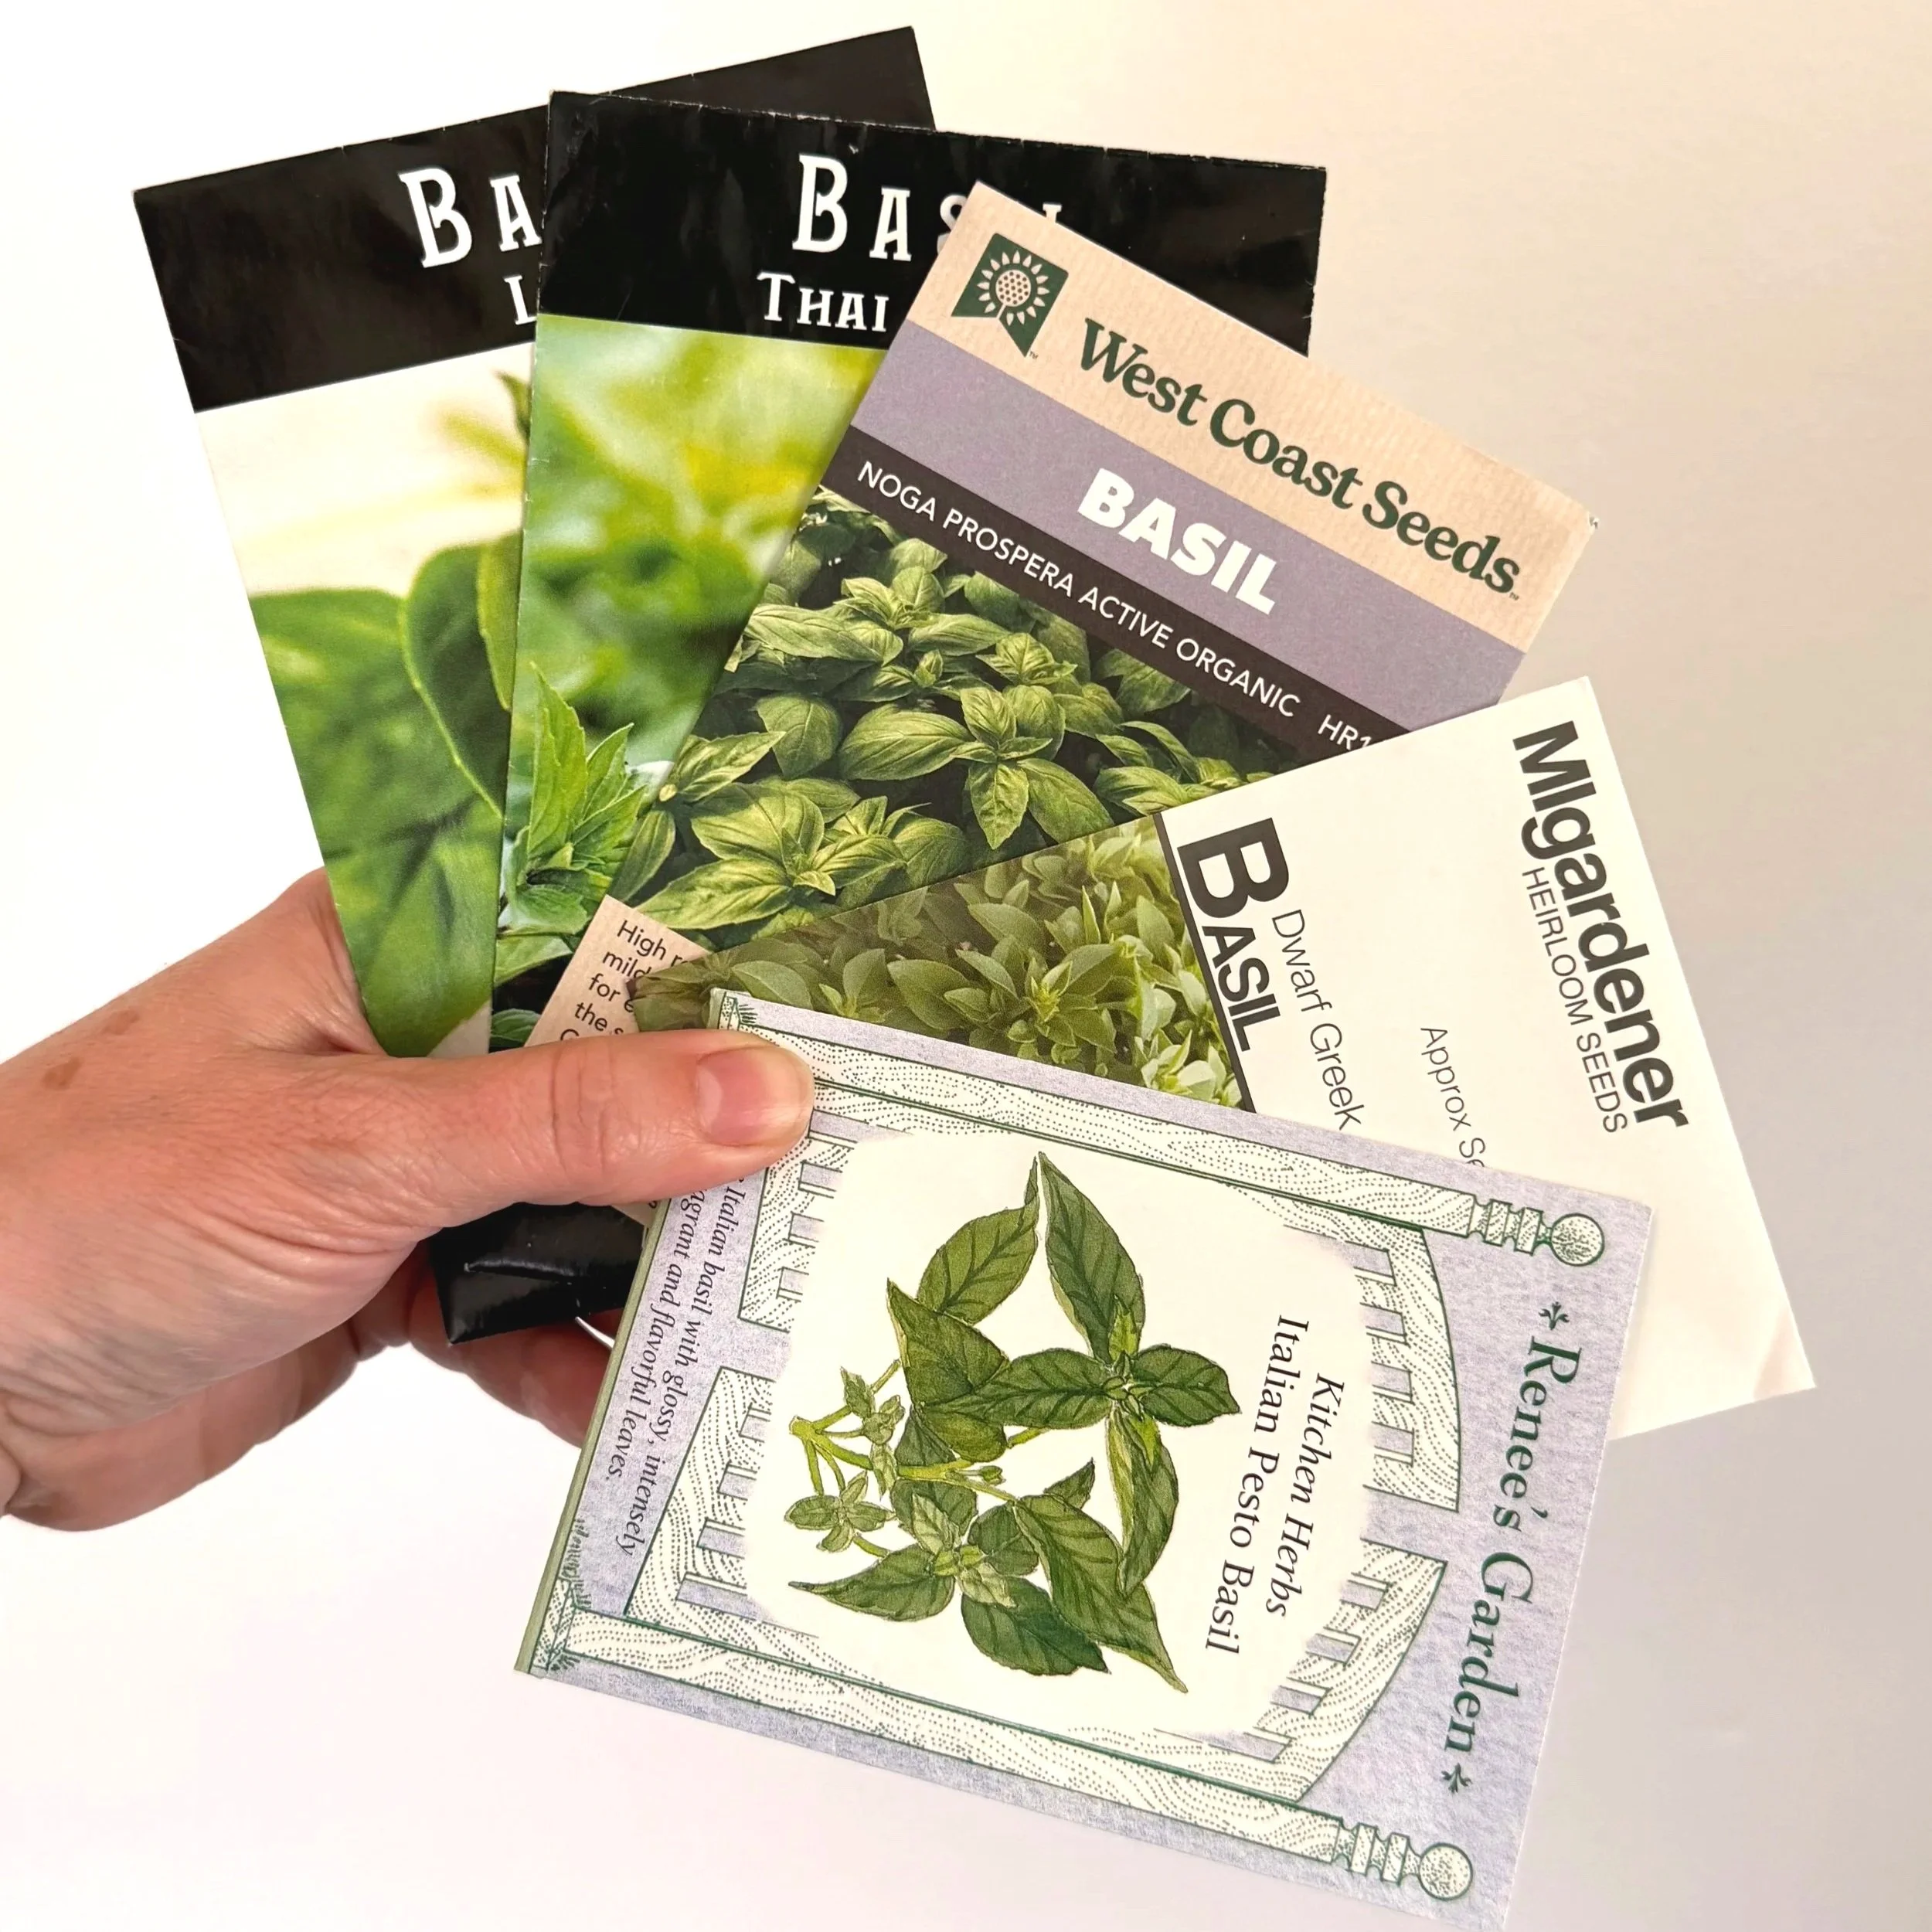
There are so many different varieties of basil!
I source a lot of my seeds from Baker Creek Heirloom Seeds — I love them as they have so many heirloom varieties, and they carry varieties you genuinely won’t find anywhere else. Some other great places are West Coast Seeds, Renee’s Garden and MI Gardener. If you’re unsure which variety to start with, an AeroGarden International basil starter pack with 8 different varieties is a great way to experiment. But there are SO many varieties! I am the proud owner of 30 different kinds!
Starting Basil from Seed
Think of basil like chia, remember that chia pet from when you were little? Or that chia pudding you saved on Pinterest that you have been meaning to try. Chia has a gelatinous coating around the seed that swells when it gets wet. So does basil. If you grow or have grown basil in soil, you probably would never have noticed. But if you grow basil hydroponically, there is more chance you will see the seed and this gelatinous goo can freak people out.
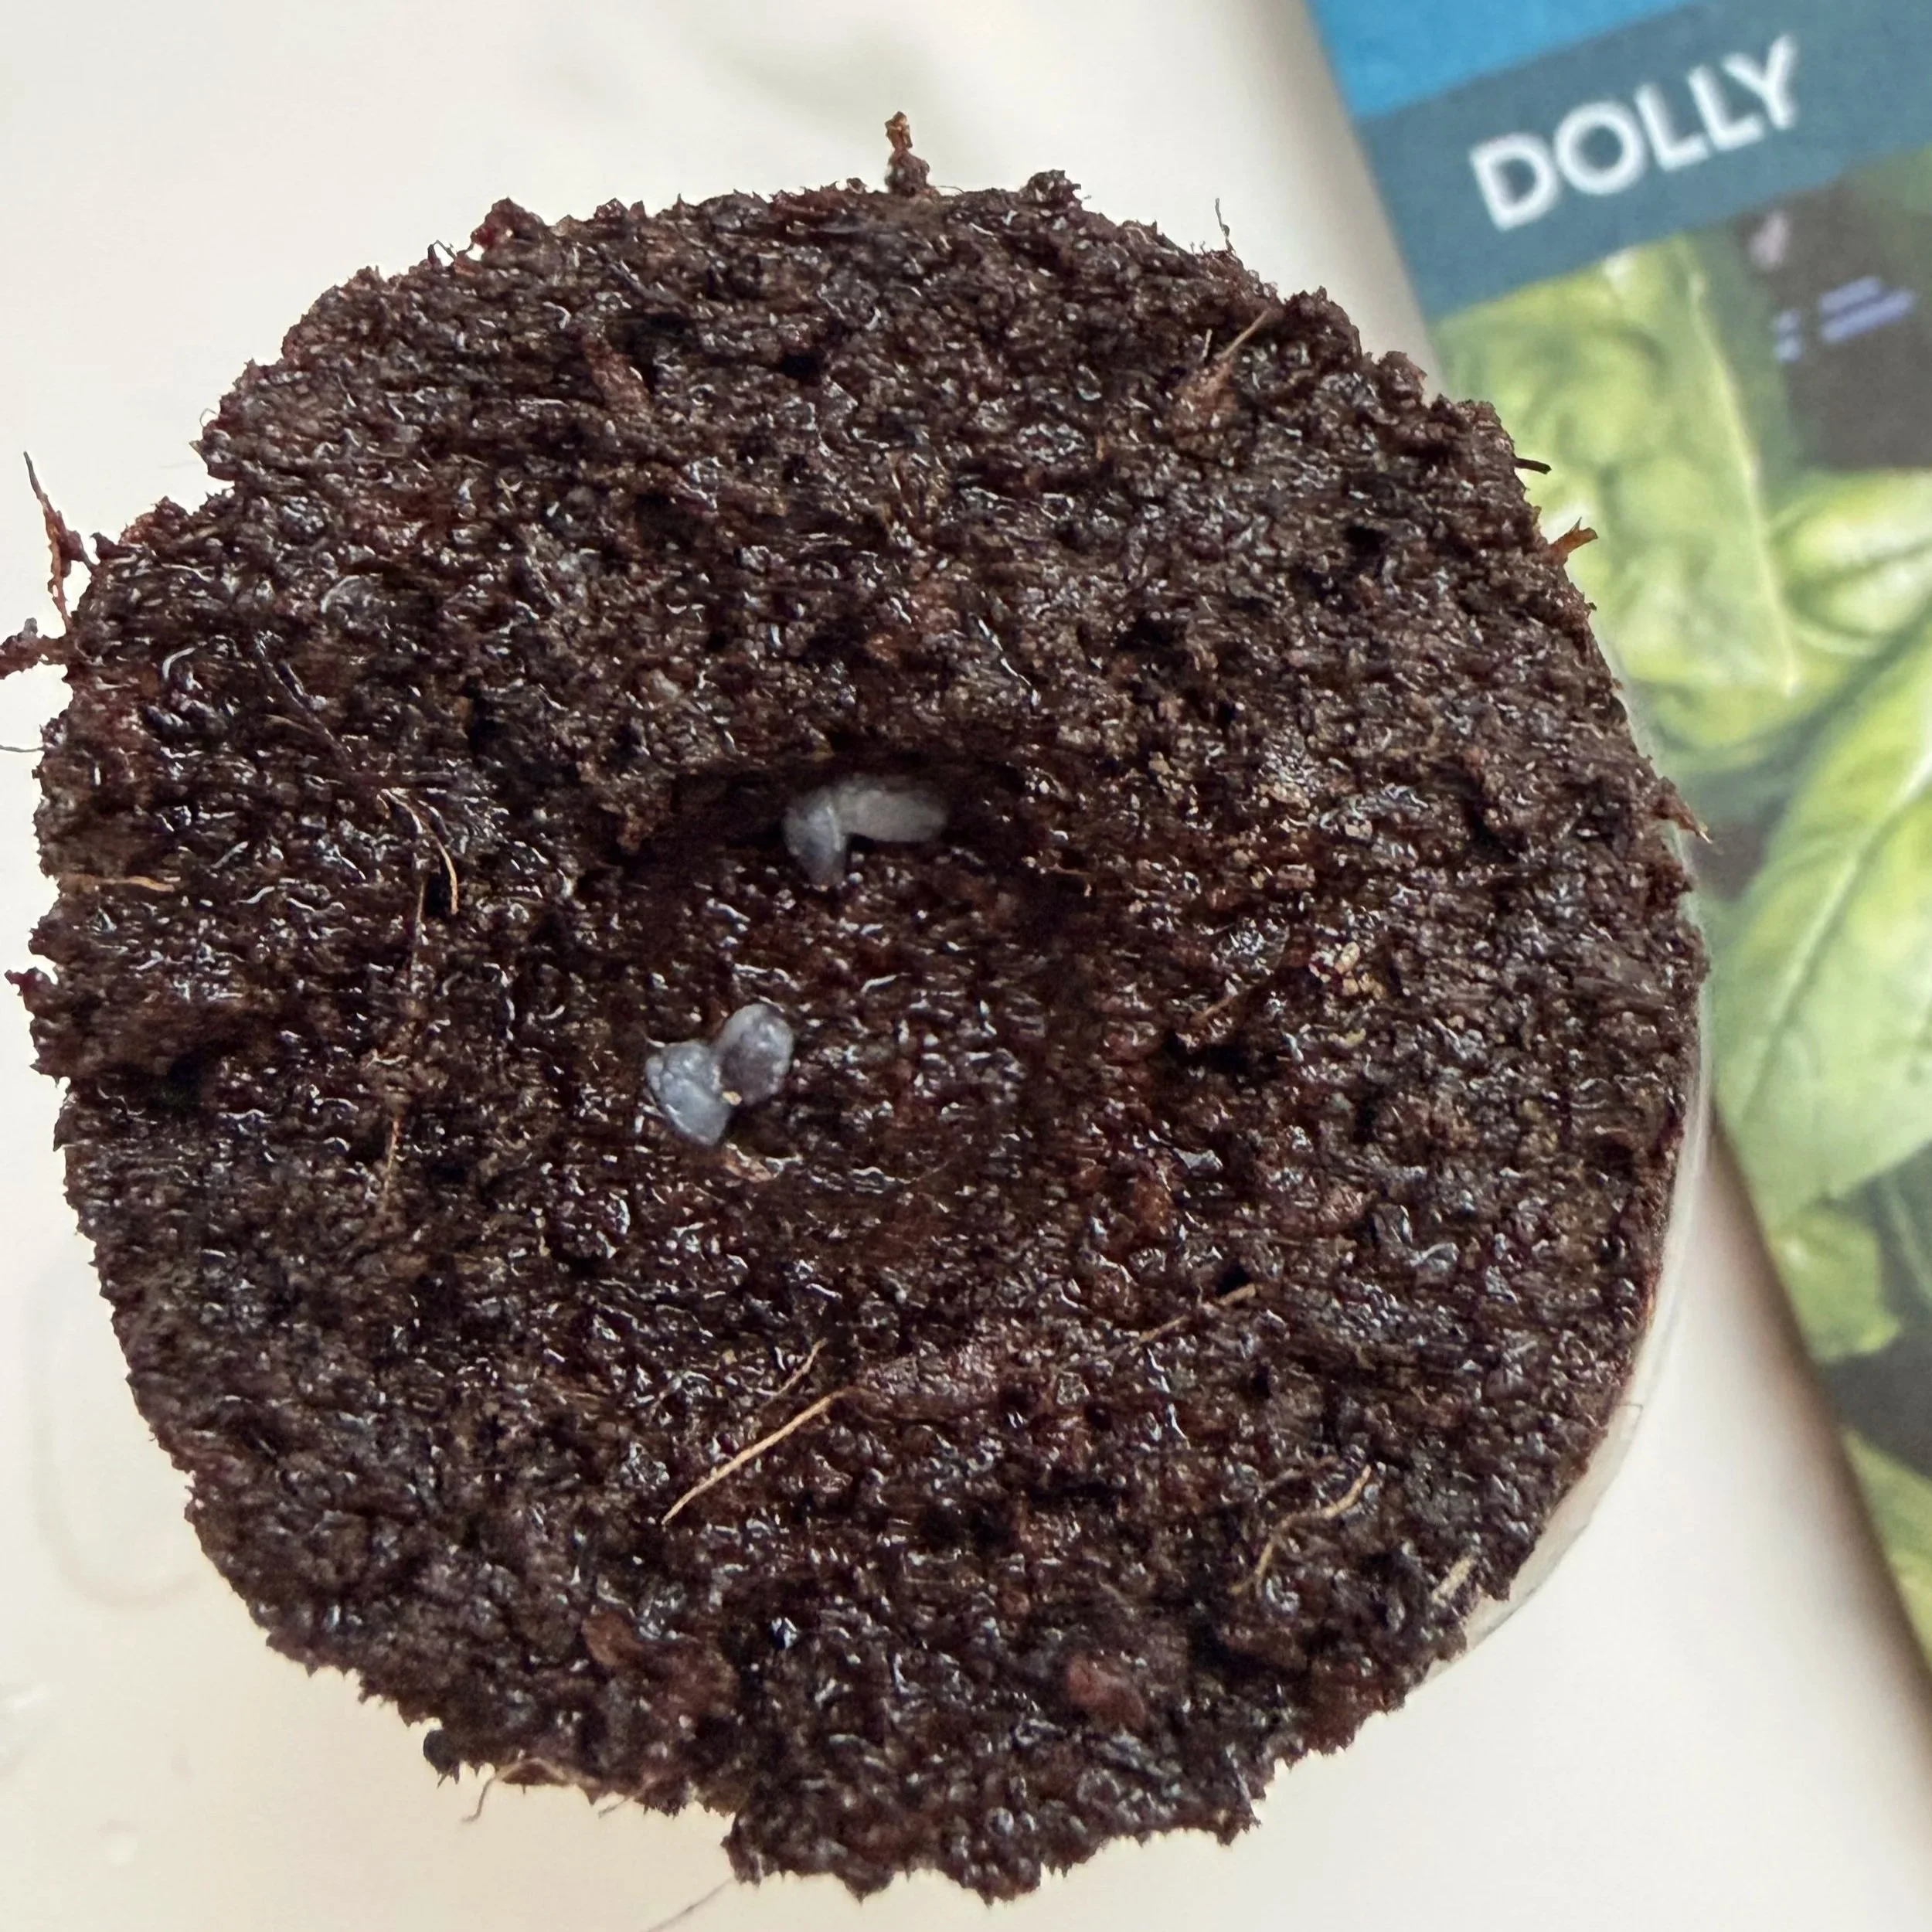
Mucilage in full effect!
Zooming in you can see the mucilage with it’s kind of eerie hue, but not to worry this is a GOOD thing. It will help these basil seeds to germinate.
This gel (made of a substance called mucilage) does serve a specific purpose though! It helps with germination by attracting and holding water around the seed. It also (out in the real world), helps the seed to stay put in the soil, which obviously is not an issue when growing basil indoors hydroponically. The gel also helps to attract nutrients towards the seed, nature is beyond cool.
Place grow baskets into your hydroponic system
Add 2–3 basil seeds per seed pod
Set the pod in the basket and cover with a grow dome (to help them germinate)
Watch for sprouts within 7–14 days
Remove domes before seedlings run the risk of touching them (this could burn delicate leaves)
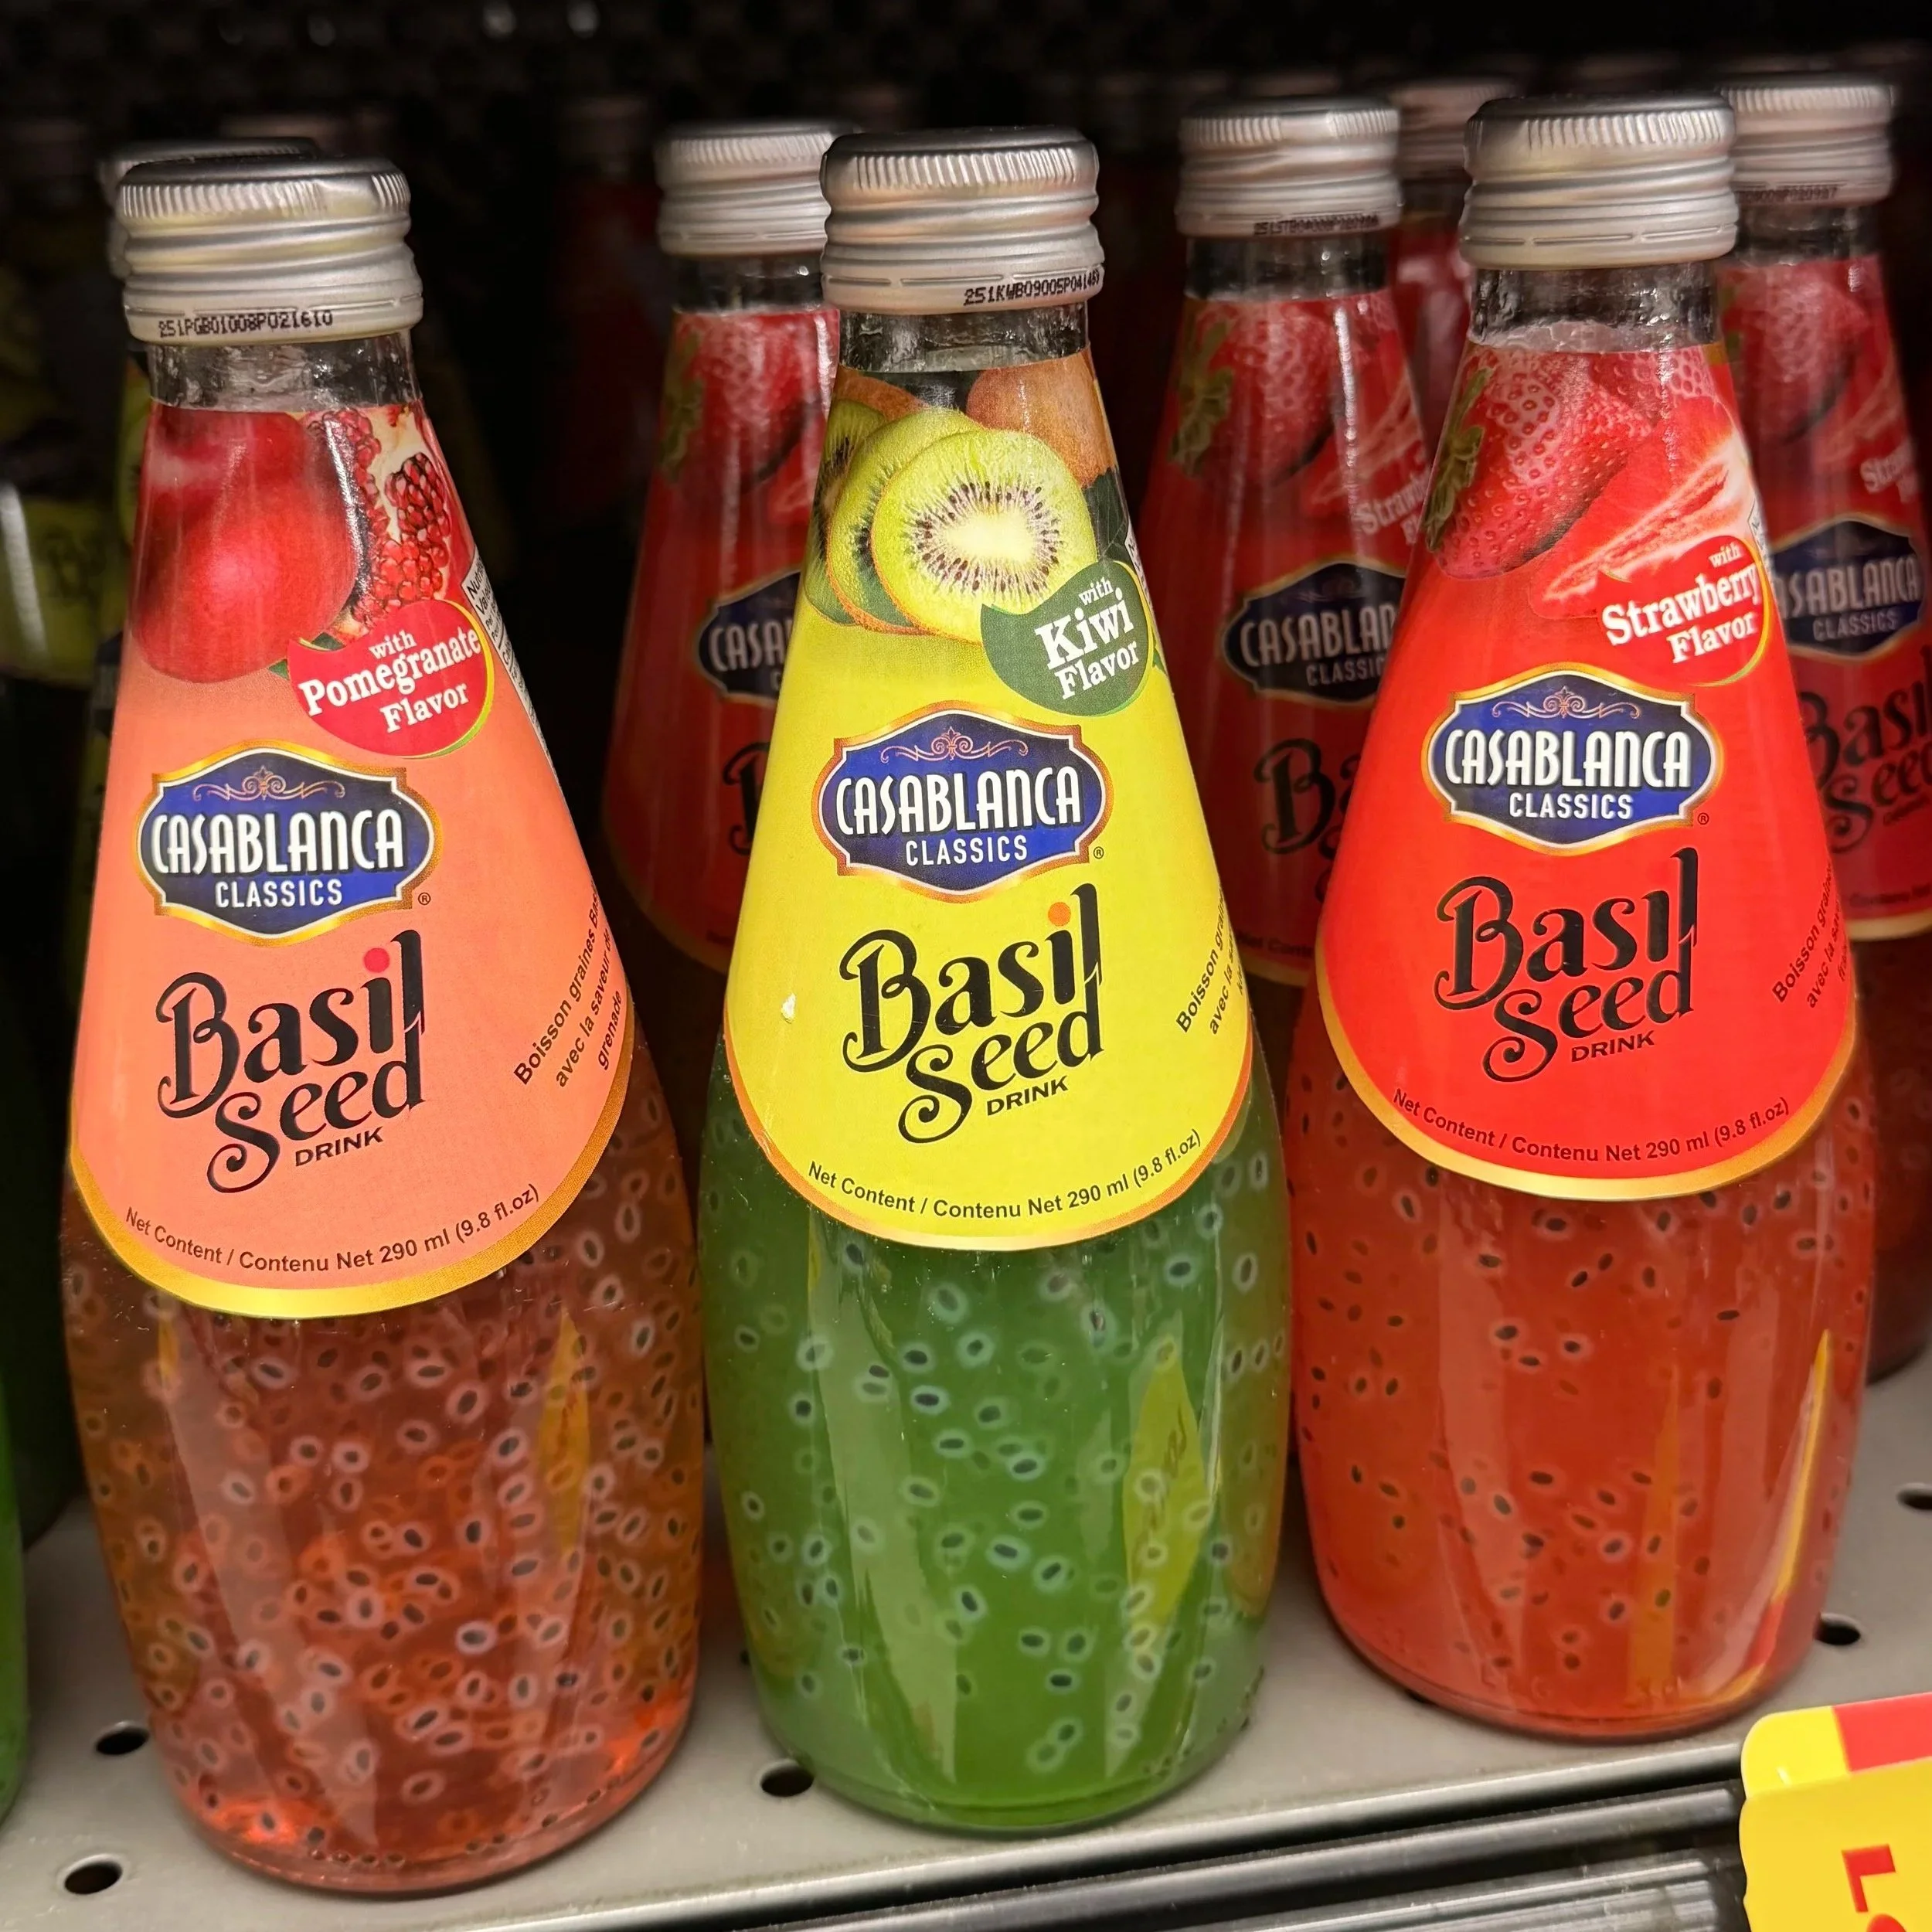
You can see the gel around the basil seeds really well in these drinks came across at the grocery store. Not my cup of tea for drinking…🤮 but I have texture issues.
Target Growing Conditions
Lighting: 14–16 hours/day, using full-spectrum LEDs
EC: 1.0-1.6
pH: 5.5-6.5
Temperature: 18-30C (65-86F)
Harvesting & Maintaining Basil
If you want to increase your future basil harvest every time you do a harvest then follow this tip. When it comes to harvesting basil, indoors or outdoors in the garden, I am going to strongly recommend that you NEVER harvest individual leaves. Why? Well if you prune just above a root node then you are going to encourage the plant to bush out. Why does this matter? Well it helps you to go from one stalk (the one you harvested) to TWO new stalks. And people, that means more basil!
When to start harvesting: Wait until the plant is at least 8” tall. This gives it enough foliage and stem strength to handle regular picking.
How to harvest: Pick individual leaves from multiple sections of the plant rather than cutting whole stems. This actually encourages more growth. If you do cut a stem, take from the top and cut just above the next leaf node. Just make sure that you never harvest more than one-third of the plant at any given time.
Pinching flower buds: As soon as you see flower buds forming, pinch them off. Once a stem flowers it becomes woody and drops essential oil and foliage production significantly. Check every stem — they’ll all try to bolt.
When to let it flower: If you want to save seeds for next season, let a plant go to flower. Once the blooms die back you’ll have tiny dark seeds to store in a cool, dry place. My Thai basil flowers last year were genuinely gorgeous, so there’s an aesthetic bonus too.
Basil is usually ready to harvest in 4–6 weeks and, with good care it can continue to produce for up to 6 months. That’s enough basil to become a genuine pesto kingpin.
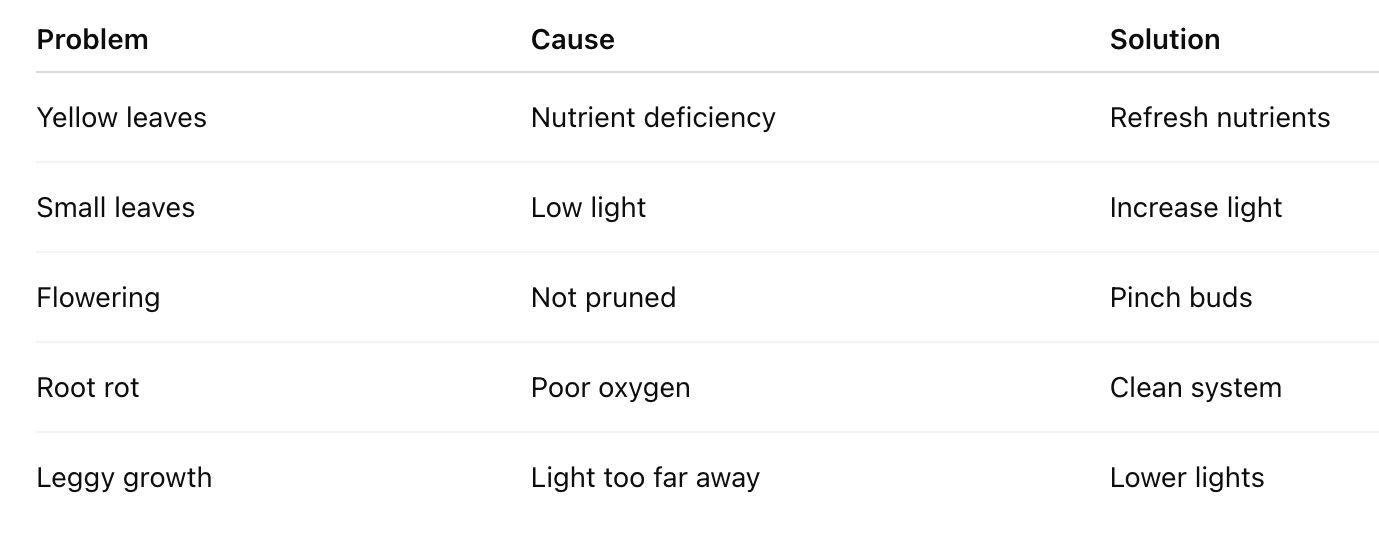
Common Problems
FAQ
-
Absolutely—and it's one of the easiest herbs to grow without soil. Basil thrives in hydroponic systems because it enjoys consistent moisture, warm temperatures, and plenty of light.
-
With regular pruning and fresh nutrients, basil can produce continuously for 4–6 months or even longer.
-
No.
-
It needs pruning.
-
Usually nutrients or lighting.
-
Absolutely. In fact, that's one of the biggest advantages of hydroponics.
-
7–14 days in a hydroponic setup, typically faster than soil. First true leaves (cotelydons) appear 2–3 weeks after germination.
-
Even indoors, aphids can be an issue. A simple solution of 2 tsp dish soap per gallon of water sprayed over the whole plant handles them well. Other potential pests are thrips and spider mites.
Hydroponic Basil as a “Seed-Starting” Method
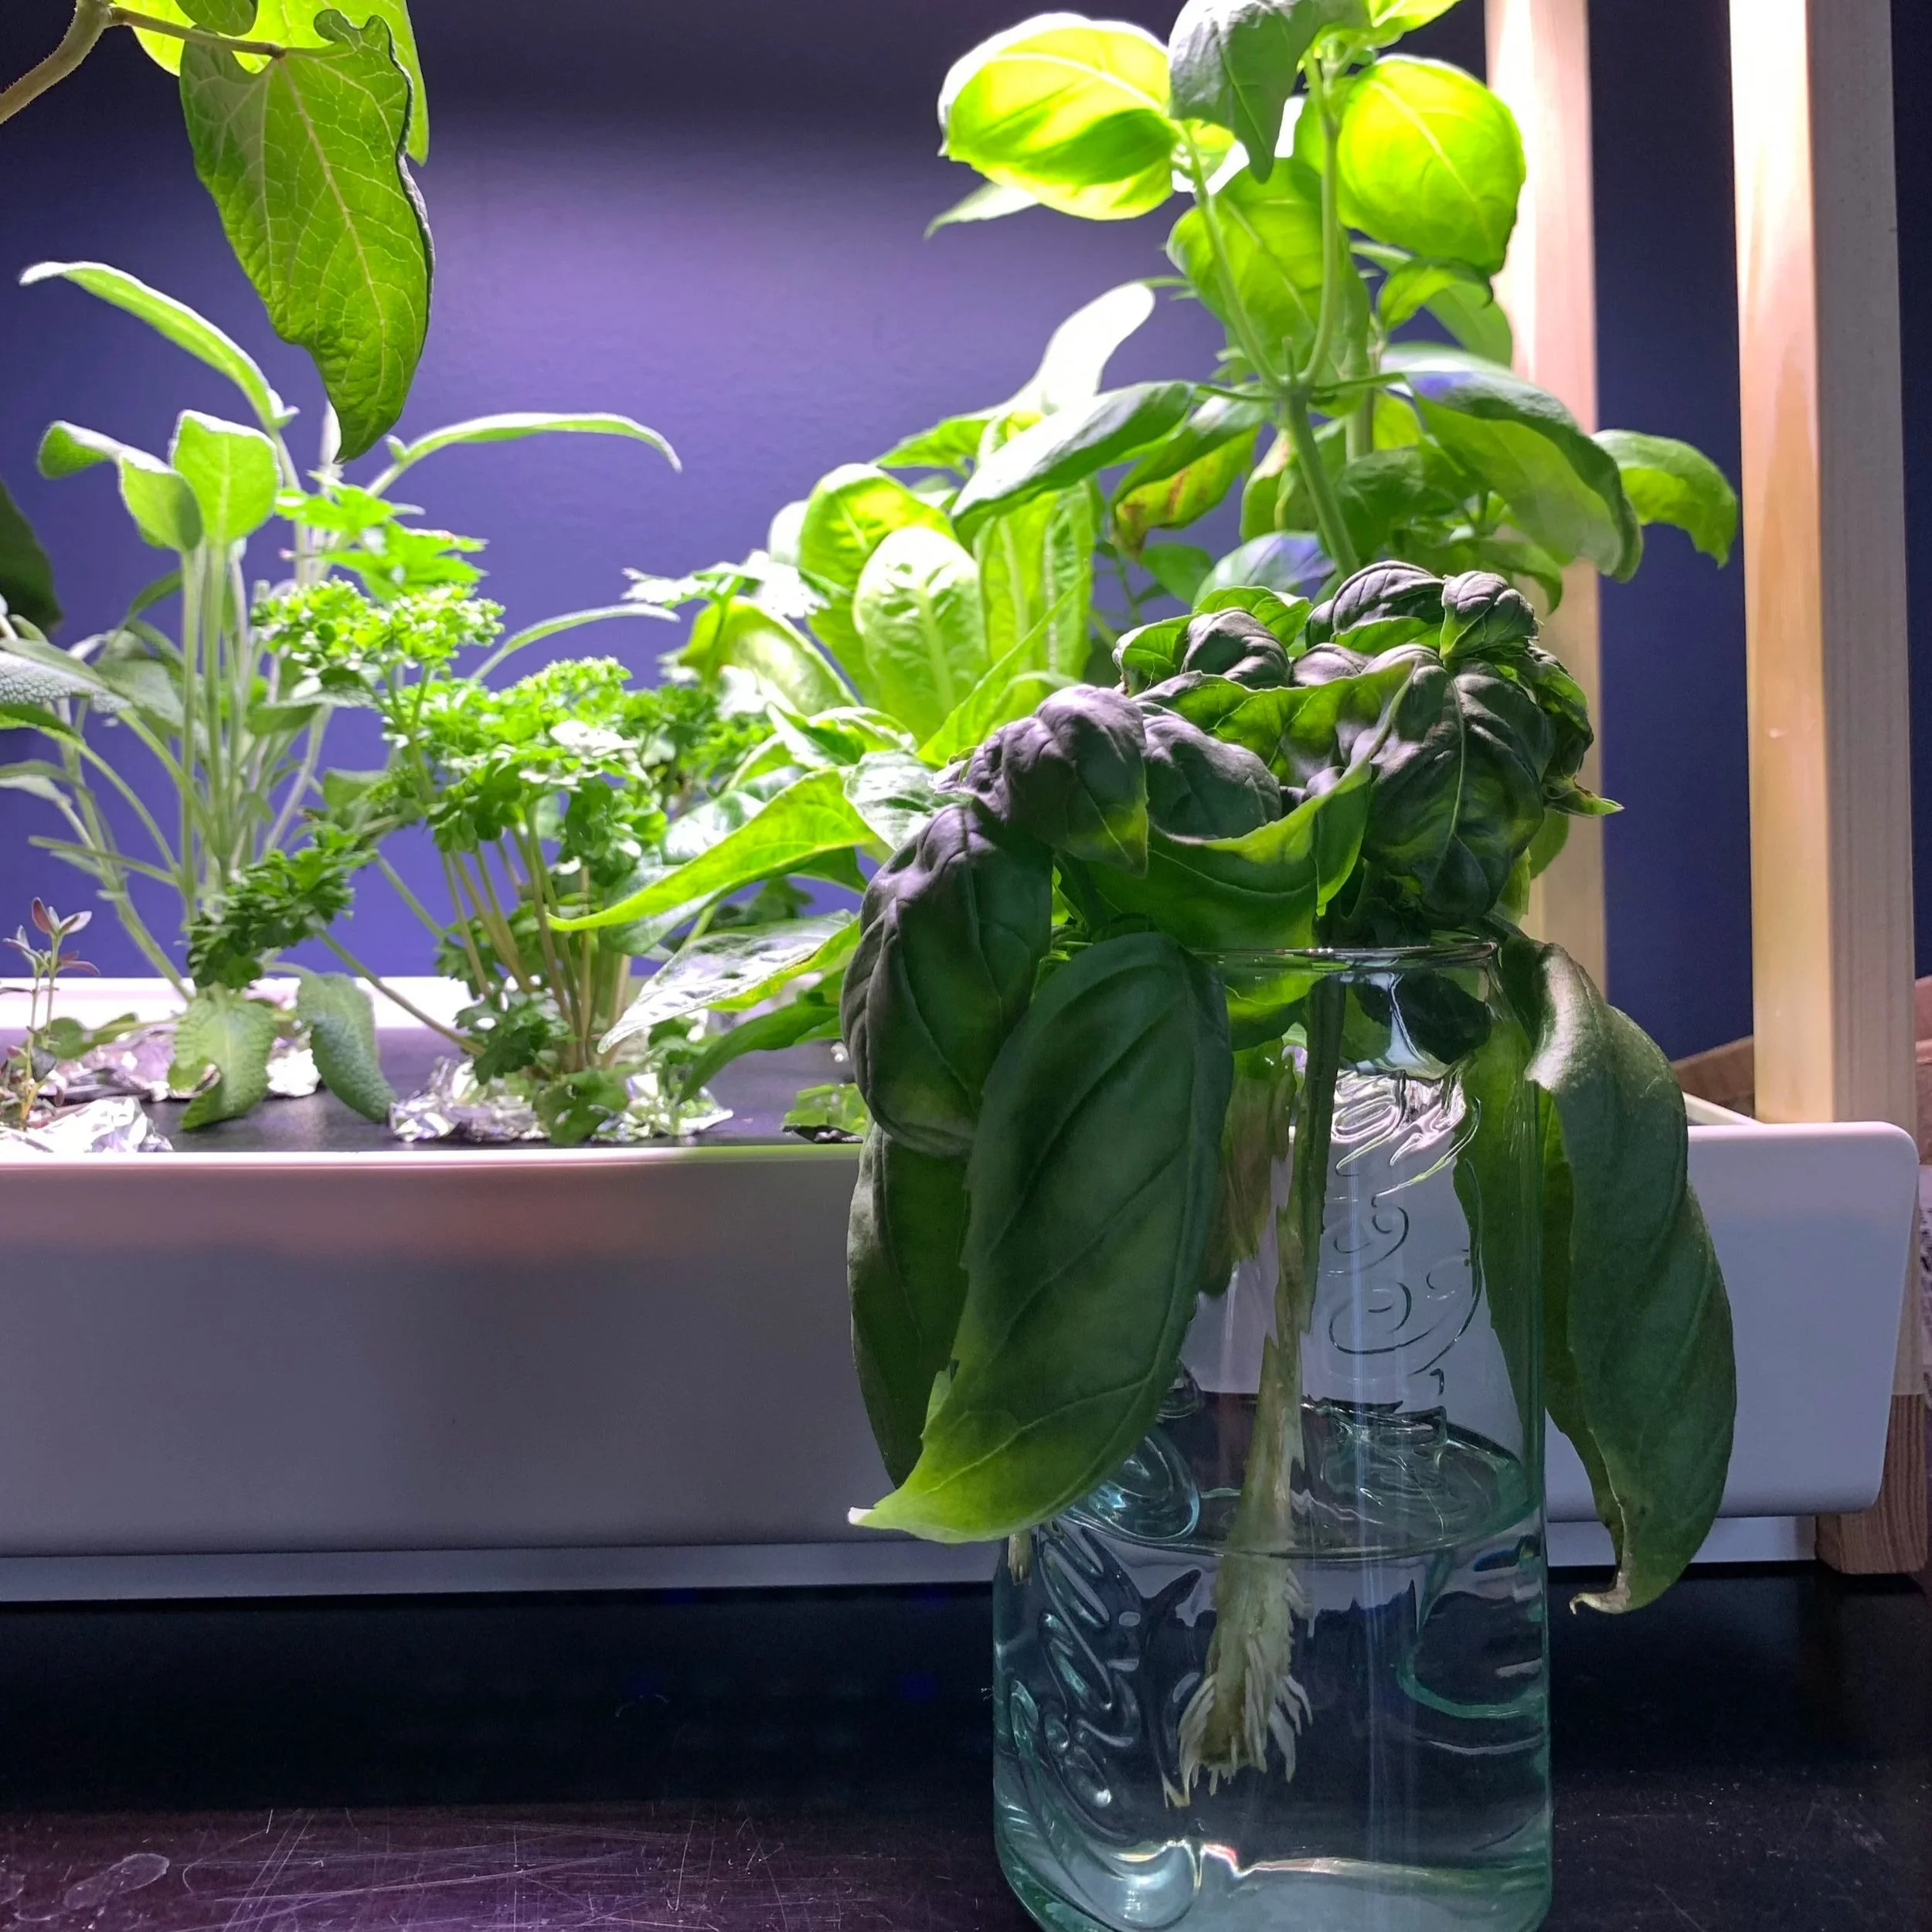
I put the seed starting in quotes as you can get basil for your outdoor garden without having to sow new seeds. In truth you don’t even need a hydroponic system! You see, basil is one of the easiest herbs to propagate! You can use some of that grocery store basil, pop it in water and wait for it to root! If you do have some growing hydroponically you can just take a cutting, try and keep it 4-6” long with the cut being just above a leaf node. Then into water, like the grocery store one and wait for the rooting to occur. The added benefit is that the plant you took the cutting from will become bushier and give you even more basil!
🌱 Final Thoughts
If you're new to hydroponics and only grow one crop this year, make it basil.
It's forgiving, productive, smells amazing, saves a surprising amount of money, and gives you fresh herbs whenever you want them. Once you've experienced harvesting basil seconds before dinner, it's hard to go back to grocery-store herbs.